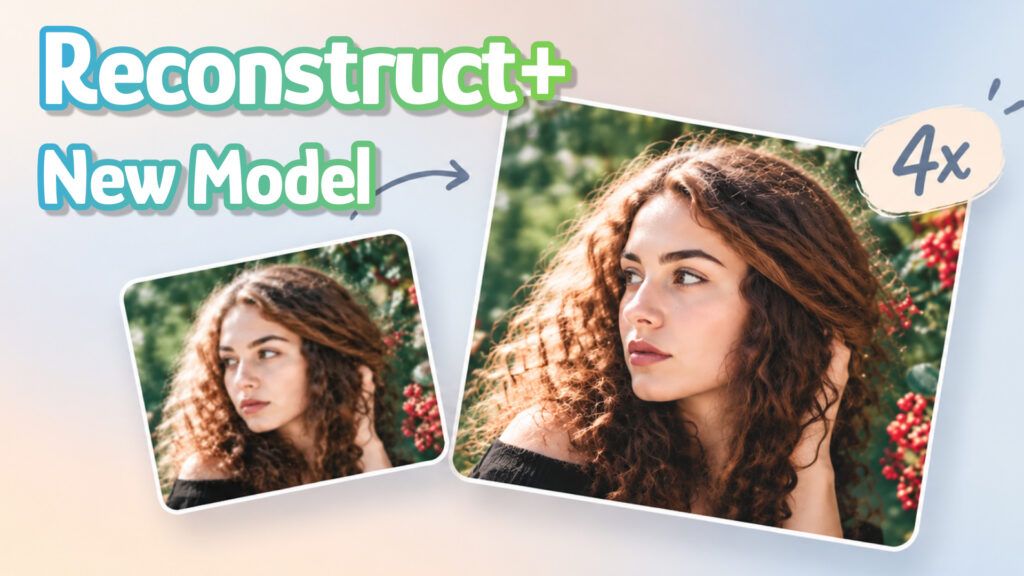
When you enlarge a low-resolution or noisy photo, you want more than sharper edges. You want the person to still look like themselves, the textures to suit the subject, and the scene to keep its original character.
Reconstruct+, the new model in Nero AI Image Upscaler, delivers stronger denoising and results that stay closer to the original image. It improves detail rendering, reduces over-smoothing in portraits, and produces fewer local distortions. Below, four 4× enlargement examples—an indoor portrait, a bird, coastal architecture, and a woodland scene—show how to look beyond sharpness when comparing Reconstruct and Reconstruct+.
Why the Reconstruct+ Upgrade Is About More Than Sharpness
Stronger denoising reduces the grain that distracts from your subject. Staying closer to the original means preserving recognizable features, outlines, texture direction, and lighting as the image is enhanced. These improvements work together: a cleaner image should not come at the expense of the details that give it character.
Reconstruct+ improves the rendering of hair and text details, with more natural-looking detail across the image. For portraits, it reduces excessive smoothing and better preserves skin and facial texture, helping avoid a plastic-looking finish. It also reduces local structural distortions and unnatural areas, keeping the enhanced image more visually consistent.
That changes what is worth looking for in a comparison. Instead of choosing whichever output looks sharpest at first glance, check whether the extra definition belongs to the subject. Does a face retain its expression? Do fine textures follow the directions visible in the input? Do architectural lines still connect where they should?
A softer result is not automatically more faithful, just as a sharper result is not automatically more accurate. The original image remains the reference for the features you can recognize.
Four 4× Enlargement Examples: Look at Noise—and What Stays Intact
Each example below uses one original input processed with Reconstruct and Reconstruct+. Both outputs have four times the input width and height. The images are presented in the order Original → Reconstruct → Reconstruct+, so you can refer back to the input rather than comparing only the two enhanced versions.
These are selected examples, not a comprehensive benchmark. Results vary with the image and processing settings. The low-resolution inputs can help you check recognizable features and composition, but they are not high-resolution ground truth for every newly rendered detail.
Low-Light Portrait: Do the Features Survive the Cleanup?
The guitar portrait combines strong window light, a partly shadowed face, and hair that crosses both bright and dark areas. Its appeal depends on that contrast. Making every part equally bright or sharply defined would change the photograph rather than simply improve it.
Original (left) | Reconstruct · 4× (central) | Reconstruct+ · 4× (right)
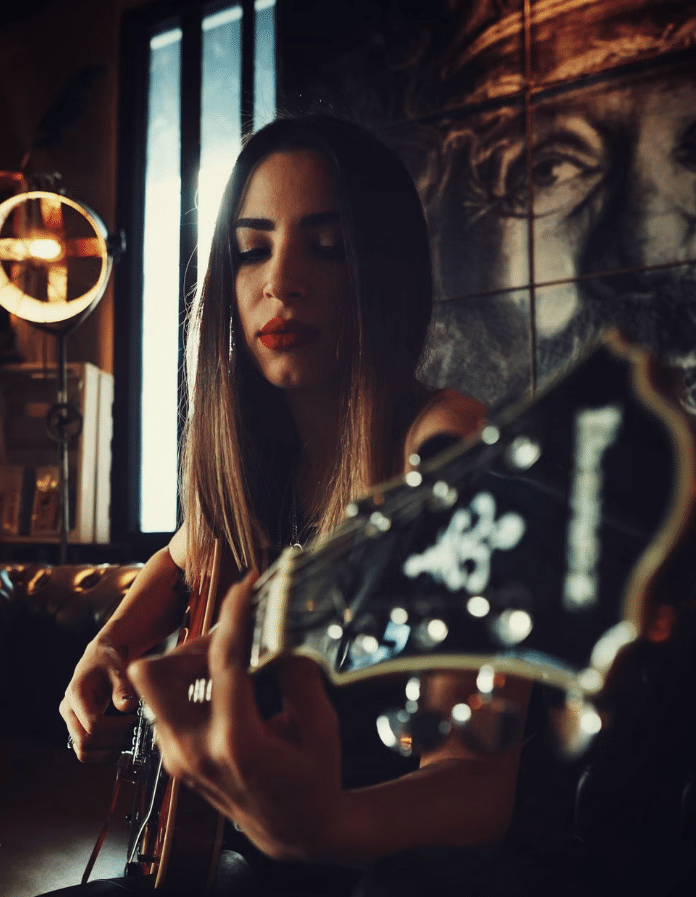
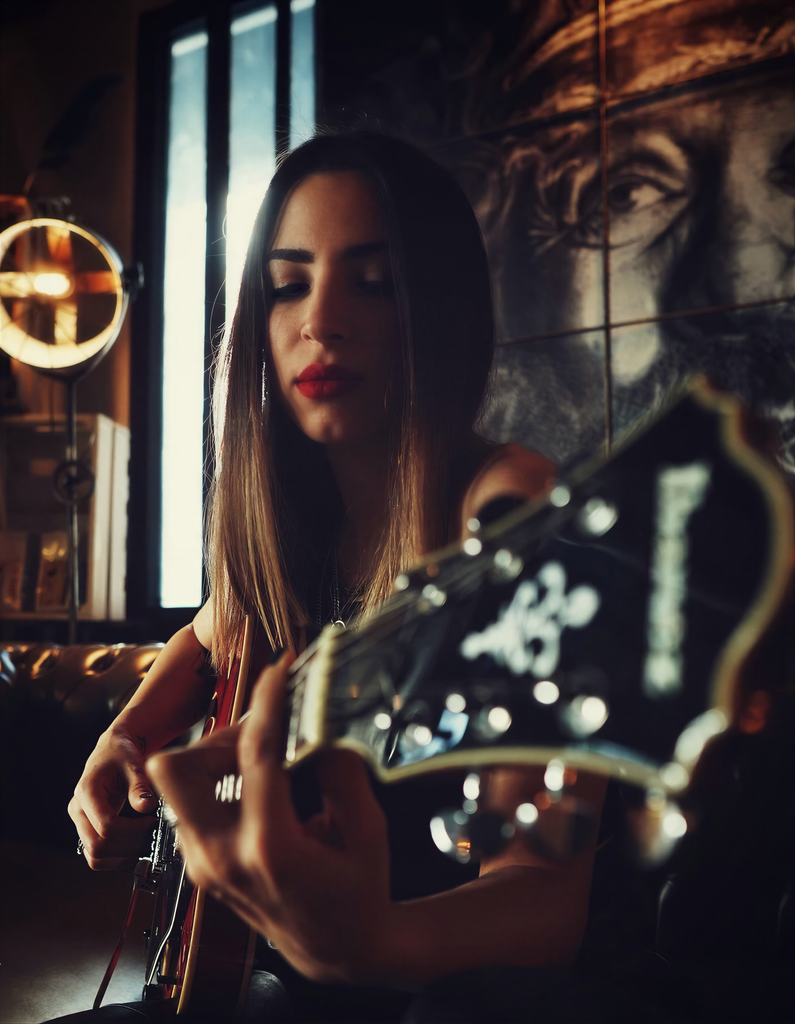
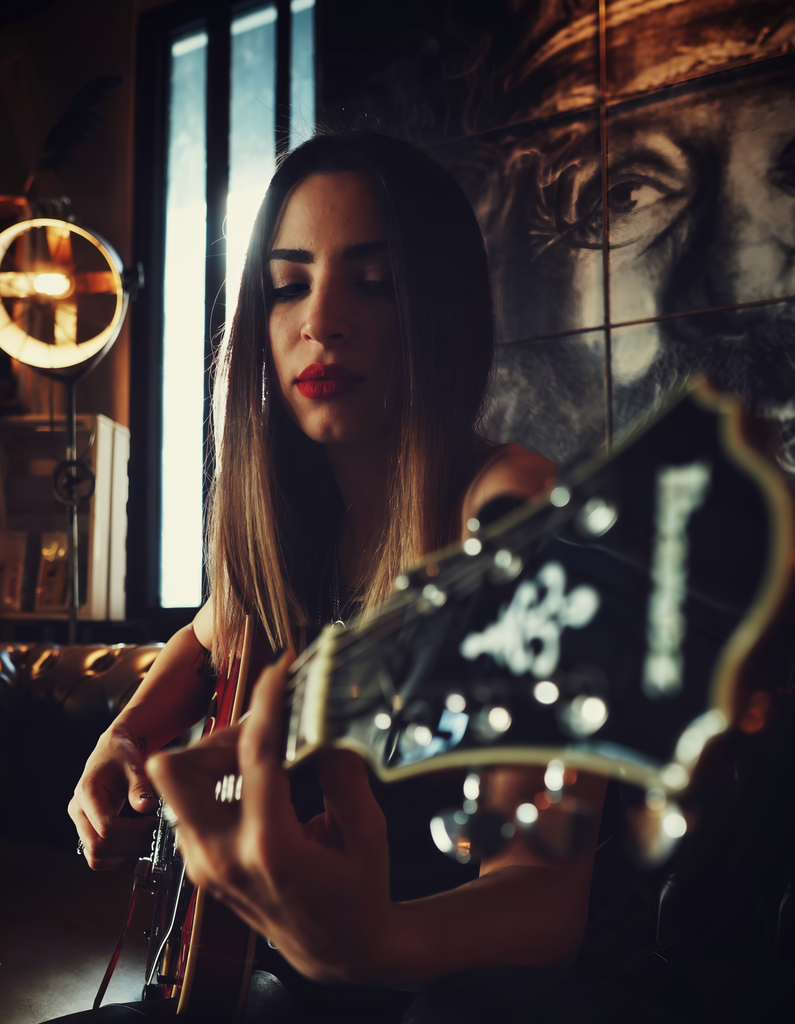
Both outputs retain the lowered eyes, red lips, and division between the lit and shadowed sides of the face. The Reconstruct+ result still shows visible texture on the illuminated cheek and forehead rather than turning those areas into a uniformly smooth surface. The window-lit strands also remain distinct from the darker body of the hair.
The useful comparison is around the eyebrow shape, hairline, mouth, and cheek contour: the areas that make the portrait recognizable. A smoother patch of skin alone would not demonstrate better preservation. Here, the retained facial texture and strong light-to-shadow transition matter more than making the whole face look polished.
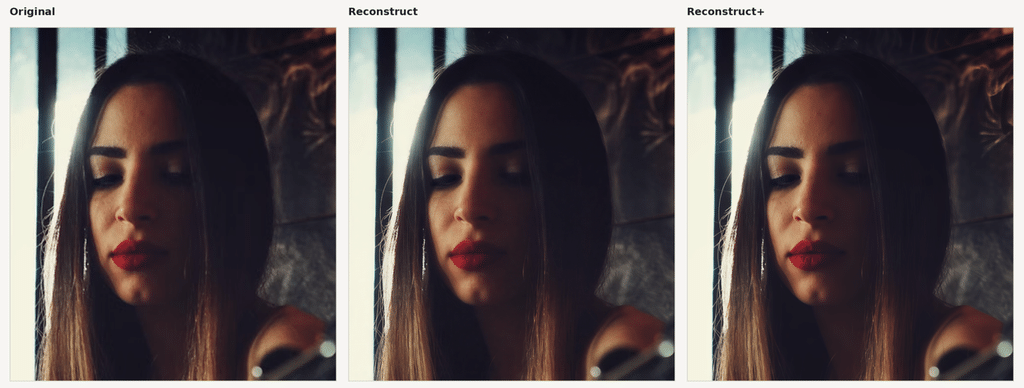
The guitar in the foreground remains out of focus. That blur is part of the original depth of field, not something the enlargement needs to remove. Preserving it keeps attention on the musician.
Bird Photography: Do Fine Textures Still Fit the Subject?
This bird image starts at just 360 × 462 pixels. Even at that size, the long beak, red eye, turquoise throat, and direction of the plumage are recognizable. Those features provide a more useful reference than the number of feather lines an enlarged output contains.
Original (left) | Reconstruct · 4× (central) | Reconstruct+ · 4× (right)



Reconstruct renders many fine, strongly separated lines around the throat and crown. Reconstruct+ gives parts of the turquoise plumage a more grouped appearance, with less emphasis on individual hair-like strokes. Both make the plumage more visible, but they interpret its fine texture differently.
Look first at the eye and beak, then move into the throat feathers. The long, tapered beak and the placement of the eye remain recognizable in the Reconstruct+ output, while the main color regions and feather directions remain consistent with the input. This is more informative than treating a denser pattern of fine lines as an automatic improvement.
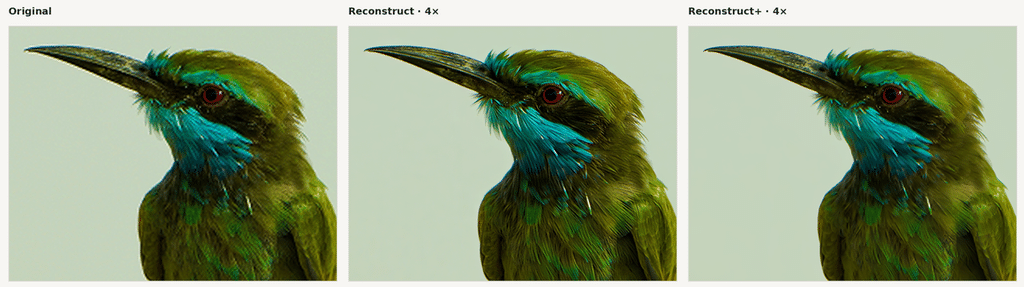
The pale background was already out of focus in the original, so its smoothness is not evidence of stronger denoising. This example is primarily about balancing fine texture with the bird’s shape—not proving that every rendered feather has been recovered exactly.
Architecture: Does the Geometry Hold Together?
Architecture makes structural changes easier to notice. A tower, repeated arches, narrow railings, and overlapping rooftops provide clear relationships to check: edges should connect, openings should remain separate, and neighboring surfaces should not merge.
Original (left) | Reconstruct · 4× (central) | Reconstruct+ · 4× (right)



In the Reconstruct+ output, the tower’s pointed silhouette, the rows of openings below it, and the adjoining rooflines remain clearly separated. The main arrangement follows the input: the tall tower anchors the scene, the smaller roof sits to its right, and the town’s rooftops overlap below.
The tower’s arches and balcony are useful places to compare the results. Their value is not simply that they contain more visible marks after enlargement; it is that repeated openings remain readable as separate architectural elements. The roof junctions offer a second check, because stronger edge definition is useful only if it does not change which surface meets which.
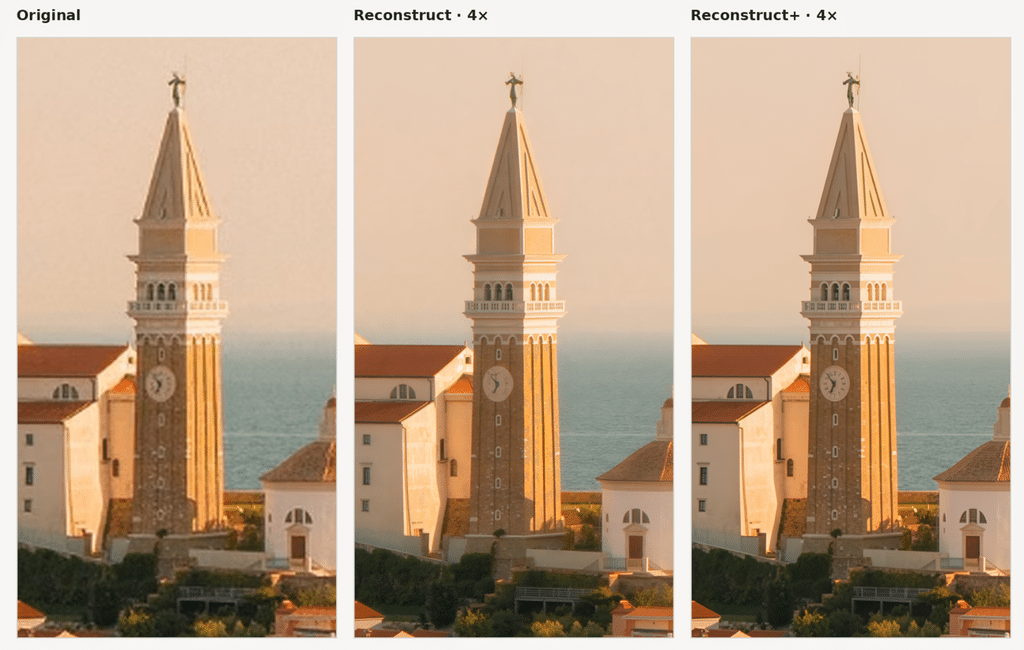
The clock face shows why visual definition and accuracy need to be treated separately. Reconstruct+ produces more distinct markings than Reconstruct in this example, but the input is too small to confirm their exact form or the hands’ accuracy. For this photograph, the stronger basis for judging fidelity is the building’s recognizable geometry.
Woodland: Do Dense Textures Stay Separate?
The woodland photograph has no single patch of fine texture to judge. Hanging branches overlap tree trunks, darker foliage fills the background, and ferns border the clearing. The bench provides a useful contrast: a simple, recognizable structure surrounded by irregular detail.
Original (left) | Reconstruct · 4× (central) | Reconstruct+ · 4× (right)
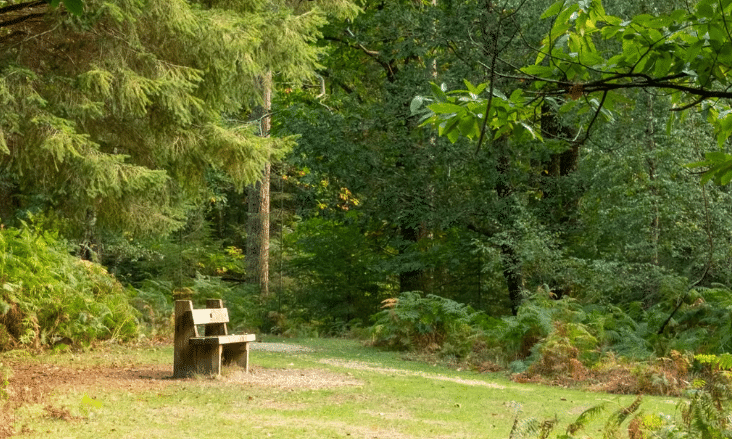
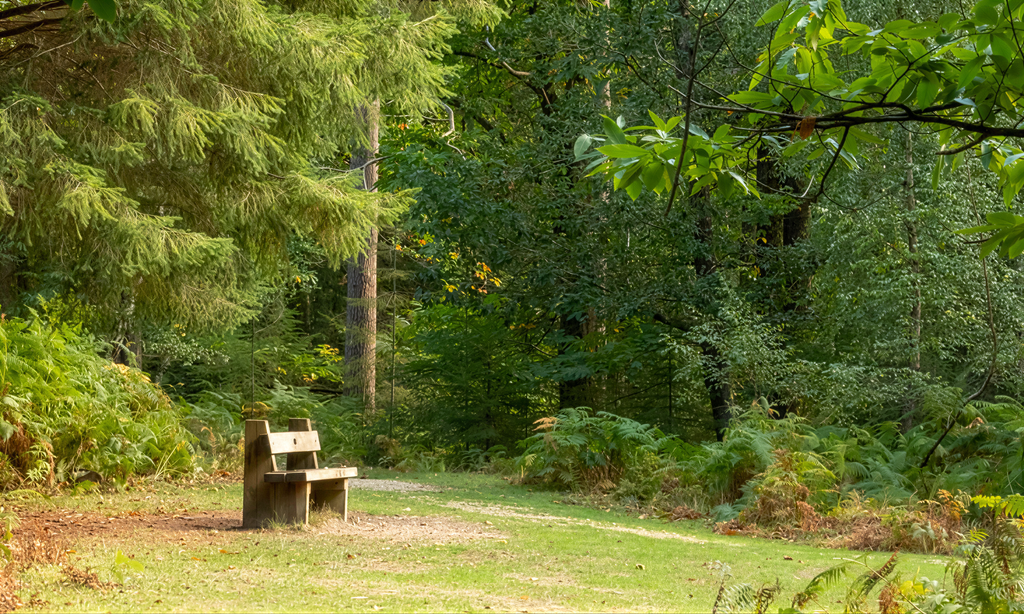
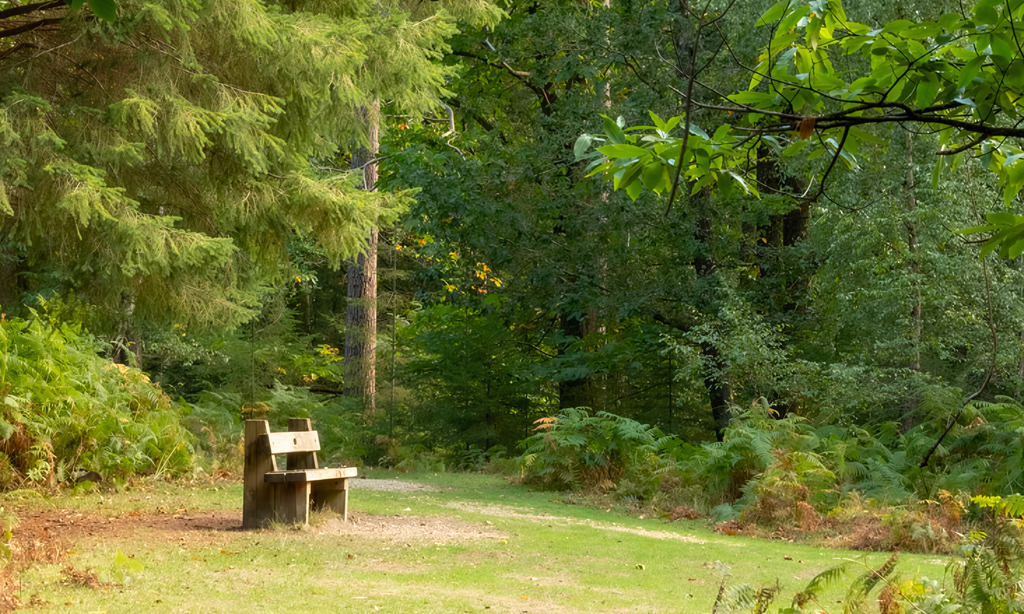
Reconstruct gives the hanging foliage on the left a more strongly etched appearance, with many fine strands standing out. Reconstruct+ renders that area more softly, while the main branches, upright trunk, and division between the clearing and deeper woodland remain visible. The difference is a trade-off in texture emphasis, not a simple contest over which image contains more detail.
The bench helps keep that judgment grounded. Its backrest, seat, supports, and open spaces remain recognizable in the Reconstruct+ result. Around it, the ferns and background trees still occupy distinct layers rather than becoming one flat green area.
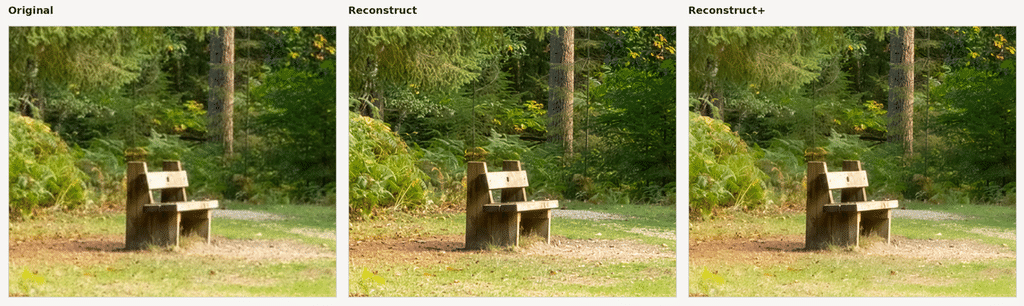
For a scene like this, “cleaner” is too broad a verdict. Fewer fine marks could mean less distracting texture, but could also mean lost foliage detail. Compare the hanging branches and darker vegetation alongside the bench edges, then judge the image at the size you actually plan to use. This example is about texture separation and scene depth, not an isolated measure of denoising strength.
Try Reconstruct+ with Your Own Images
Open the Nero AI Image Upscaler, upload your image, and select Reconstruct+ with an enlargement factor available on the page.
To compare it with Reconstruct, use the same input and enlargement factor, and keep Face Enhance settings consistent. Check the same area in each result alongside the original, then return to your intended display size. A difference that looks dramatic under close inspection may matter less in a finished web image or social post; a small change to an important feature may matter more.
AI reconstruction does not recover every piece of real information missing from an image. Looking clearer does not mean the text is necessarily correct. Keep the original and verify details that need to be accurate, especially text, identity-related features, and factual records.
Try Reconstruct+ with your own photo in Nero AI Image Upscaler.