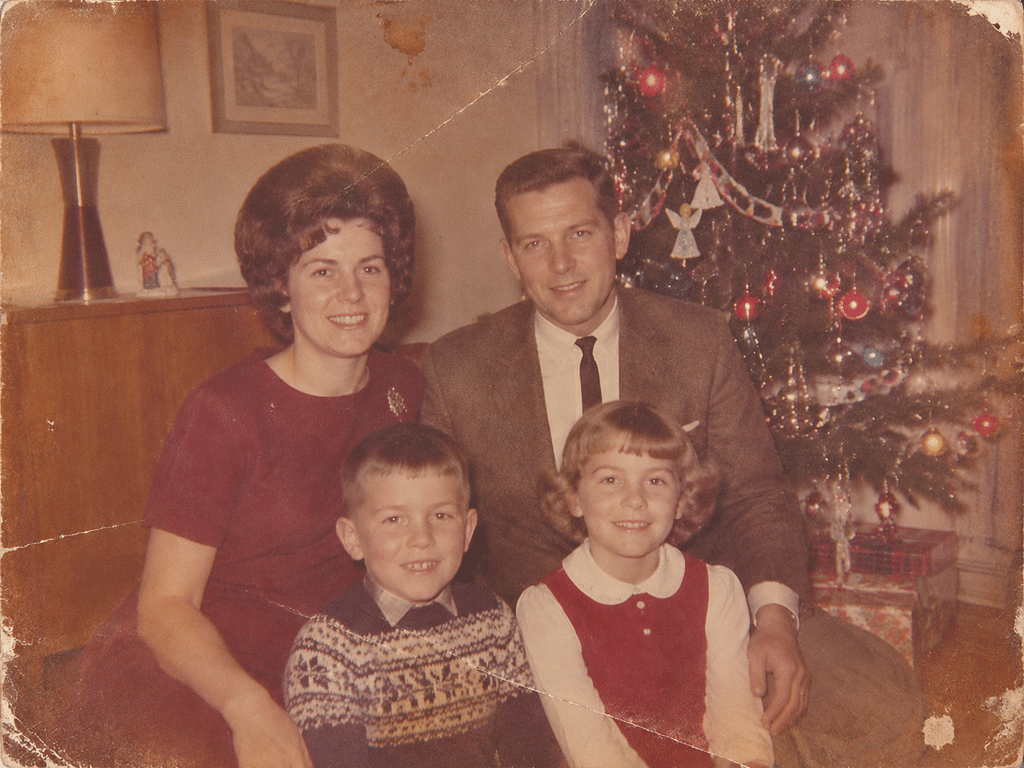
We’re using an old Christmas family portrait to show how to prepare a restored photo for printing. The original has a noticeable brown cast, a long crease across the children’s clothes, and scratches near the edges. After restoration, the sweater pattern and tree ornaments are easier to see.
To turn a photo like this into a framed gift, make a clear digital copy, restore it, compare the result with the original, and check the crop before ordering a print.
1. Choose a Family Photo and Make a Clear Digital Copy
Pick a photo the recipient will recognize or want to ask about. In this Christmas portrait, the tree and the presents underneath it are part of the scene you may want to keep in the gift print. Keep the entire photo in your first digital copy so you can make that framing decision later.
If the print lies flat and is in good condition, use a flatbed scanner with a clean glass surface. Keep brittle or curled photos out of a sheet-fed scanner and avoid forcing them flat. If you’re using a phone, hold it parallel to the print in even light. Check for reflections and make sure all four corners are visible before you put the photo away. The U.S. National Archives’ guide to digitizing family photographs has more guidance on handling originals.
Already have a scan? Zoom in on the faces and edges. If they look smeared, blocky, or cut off and you still have the print, make a fresh copy. Keep the original photo and save the untouched digital file separately.
2. Restore the Photo and Check the Faces Against the Original
In the original, the long diagonal crease cuts across the boy’s sweater and the girl’s dress. A second scratch runs diagonally above the woman’s head, and the corners show white scuffs. In the restored image, those lines and scuffs are no longer visible, and the sweater pattern is easier to follow where the crease used to run.
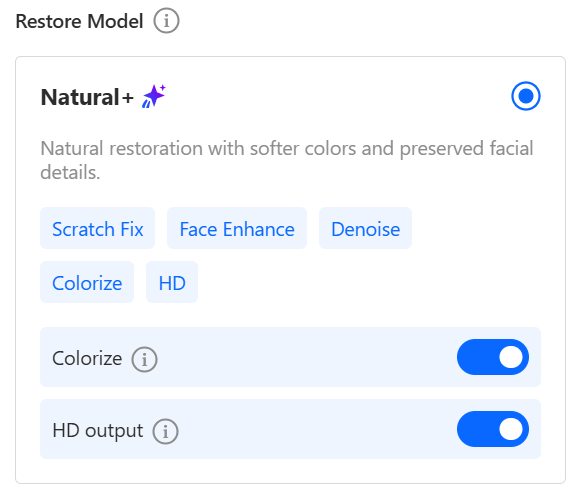
To try this with your own photo, upload your digital copy to our Nero AI Photo Restoration tool and choose a restoration model. Natural+ gives a softer result and enhances facial detail. Restore+ combines scratch repair with color restoration, facial enhancement, and noise reduction. Start with the model that fits the damage you see. Check the available output options and required Credits before processing.
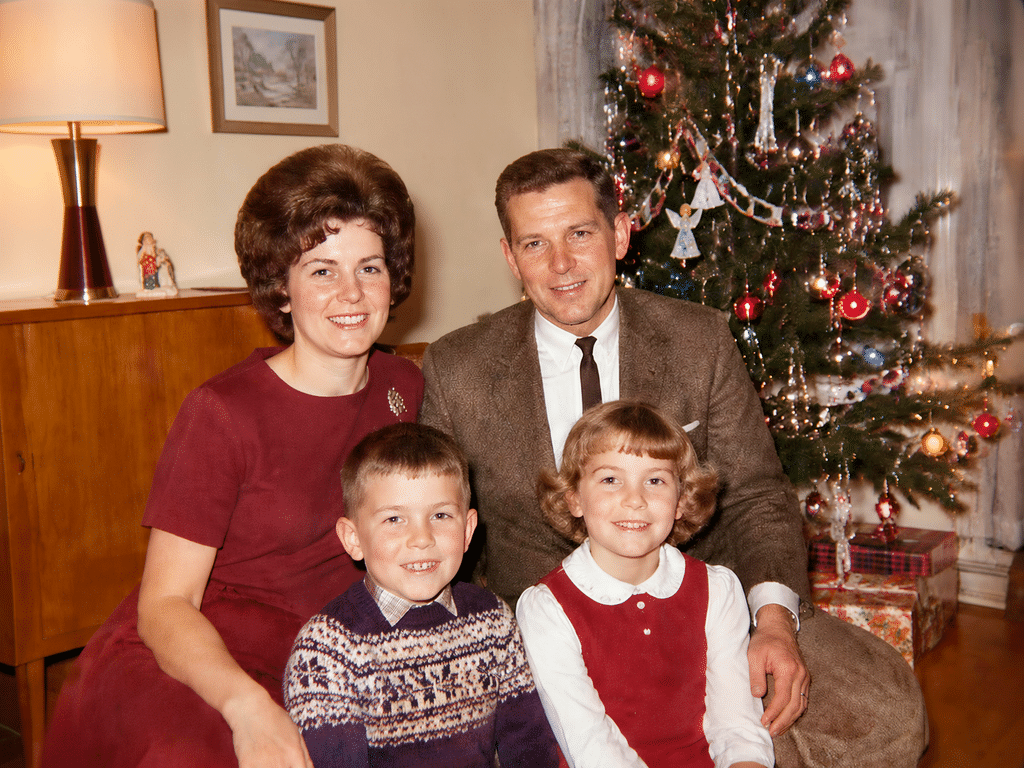
In the restored portrait, the children’s eyes and smiles are clearer, and the expressions of all four people are still recognizable beside the original. When we compare a before-and-after pair, we look at the whole image first, then zoom in on the same area in both versions. On your own photo, pay particular attention to the eyes, the shape of the mouth, and the edges of any repair.
If the repair softens a feature too much or leaves an obvious patch, try a gentler result. When a large piece of a face is missing, another family photo may make a better gift. A professional restorer is also an option, especially if you have another photo of the person to use as a reference.
If you’re restoring a black-and-white photo, and you don’t want to colorize it. Simply turn off the Einfärben option before processing to preserve its original black-and-white appearance while improving its details. If you’d like to try a color version, turn Colorize on and save the result separately. Remember that AI-generated colors are estimates, not necessarily accurate representations of the original scene.
Download the version you want to print. Open the saved file and note its width and height in pixels. You’ll need both when choosing the print size.
3. Check the Print Size and Crop Before You Order
Start with the part of the frame where the photo will actually show. If the frame has a mat, measure the opening and check which print size the frame takes. Then compare the downloaded file’s pixel dimensions with your print provider’s recommendation for that print size. The Shutterfly Photo Prints Guide explains how image resolution and crop previews affect the finished print.
For this Christmas portrait, try a 5 × 7-inch landscape crop. In the preview, check how much room remains below the children and how much of the tree and presents you can keep. If the crop takes out something you want in the frame, try repositioning it. If there’s still too little room, see whether the shop can fit the whole image with a border, or pick a print size closer to the photo’s original proportions. Leave some breathing room around faces that sit near the edge of the mat opening.
After adjusting the crop, check the remaining pixel dimensions or any resolution warning from your print provider. Cropping removes pixels, so a file that met the size recommendation before cropping may no longer meet it afterward. See Shutterfly’s guidance on cropping and print quality.
If the file is short on pixels, try a smaller print or make a better scan if you still have the original. If you can’t rescan, you can try our AI Image Upscaler, then review the enlarged result carefully before printing.
4. Order the Print and Frame It Before Christmas
Work backward from the day you’ll give the gift. Allow time to pick up or receive the print, inspect it, and fit it into the frame. Check the shop’s holiday cutoff for your chosen size and delivery option. If you’ll be handing over the gift at an early family gathering, use that date when you plan the order.
When time is tight, check local pickup before relying on shipping. Confirm that the shop offers your chosen size and can have the print ready when you need it. If that size is unavailable, see whether a standard size in stock works with your crop and a frame you can get locally.
When the print arrives, check the faces and picture edges again with the photo in the frame. A small card with the names, place, or year can give the recipient something to talk about when they open it.
Ready to restore an old family photo for Christmas? Try Nero AI Photo Restoration and give your favorite family memories a fresh look.